Изображение глубины RealSense OpenCV слишком темное
Folks,
У меня есть realsense SR300, но когда я показываю мое изображение глубины в окне opencv, оно выглядит слишком темным. Как я могу это исправить? Когда я запускаю примеры realsense, изображения выглядят хорошо, но в примерах используется OpenGL. Но мне нужен OpenCV для моих проектов. Вот мой код:
int main(int argc, char ** argv)
{
// realsense camera setup
rs::log_to_console(rs::log_severity::warn);
// Create a context object. This object owns the handles to all connected realsense devices
rs::context ctx;
if (ctx.get_device_count() == 0)
{
throw std::runtime_error("No device detected. Is it plugged in?");
}
// Access the first available RealSense device
rs::device * dev = ctx.get_device(0);
// Configure depth to run at VGA resolution at 30 frames per second
dev->enable_stream(rs::stream::depth, 640, 480, rs::format::z16, 30);
rs::intrinsics depth_intrin;
rs::format depth_format;
depth_intrin = dev->get_stream_intrinsics(rs::stream::depth);
depth_format = dev->get_stream_format(rs::stream::depth);
cv::namedWindow("Send Display Image", CV_WINDOW_AUTOSIZE);

/* Set callbacks prior to calling start(). */
auto depth_callback = [depth_intrin, depth_format](rs::frame f)
{
cv::Mat image(cv::Size(640, 480), CV_16UC1,
(void*)f.get_data(), cv::Mat::AUTO_STEP);
cv::imshow("Send Display Image", image);
cv::waitKey(1000/80);
};
/* callback to grab depth fream and publish it. */
dev->set_frame_callback(rs::stream::depth, depth_callback);
// Start streaming
dev->start();
While(1)
{

}
return 0;
}
Я не уверен, почему мой образ такой темный. Я хочу, чтобы это выглядело как kinect или Xtion, когда я запускаю openni_launch из ROS
Решение
Редактировать:
Приведенная ниже нормализованная функция вызывает некоторое мерцание:
- Я подозреваю, что это связано с мерцанием максимальной глубины.
- Минимальное значение глубины всегда
0поскольку это значение используется, когда глубина недопустима и, таким образом, диапазон глубины становится ложным.
Вместо этого вы должны использовать это:
void make_depth_histogram(const Mat &depth, Mat &normalized_depth) {
normalized_depth = Mat(depth.size(), CV_8U);
int width = depth.cols, height = depth.rows;

static uint32_t histogram[0x10000];
memset(histogram, 0, sizeof(histogram));

for(int i = 0; i < height; ++i) {
for (int j = 0; j < width; ++j) {
++histogram[depth.at<ushort>(i,j)];
}
}

for(int i = 2; i < 0x10000; ++i) histogram[i] += histogram[i-1]; // Build a cumulative histogram for the indices in [1,0xFFFF]

for(int i = 0; i < height; ++i) {
for (int j = 0; j < width; ++j) {
if (uint16_t d = depth.at<ushort>(i,j)) {
int f = histogram[d] * 255 / histogram[0xFFFF]; // 0-255 based on histogram location
normalized_depth.at<uchar>(i,j) = static_cast<uchar>(f);
} else {
normalized_depth.at<uchar>(i,j) = 0;
}
}
}
}
Вы наблюдаете, потому что поток глубины закодирован на 16 битах (rs::stream::z16) тогда как при отображении будут использоваться только 8 бит.
Вы можете нормализовать свою карту глубины:
double min, max;
minMaxLoc(depth, &min, &max);
Mat depth_normalized;
double alpha = 255.0/(max-min);
depth.convertTo(depth_normalized, CV_8U, alpha, -min*alpha);
Или используйте вид карты цветов для отображения глубины: make_depth_histogram().
Полный демонстрационный код:
inline void make_depth_histogram(const Mat &depth, Mat &color_depth) {
color_depth = Mat(depth.size(), CV_8UC3);
int width = depth.cols, height = depth.rows;

static uint32_t histogram[0x10000];
memset(histogram, 0, sizeof(histogram));

for(int i = 0; i < height; ++i) {
for (int j = 0; j < width; ++j) {
++histogram[depth.at<ushort>(i,j)];
}
}

for(int i = 2; i < 0x10000; ++i) histogram[i] += histogram[i-1]; // Build a cumulative histogram for the indices in [1,0xFFFF]

for(int i = 0; i < height; ++i) {
for (int j = 0; j < width; ++j) {
if (uint16_t d = depth.at<ushort>(i,j)) {
int f = histogram[d] * 255 / histogram[0xFFFF]; // 0-255 based on histogram location
color_depth.at<Vec3b>(i,j) = Vec3b(f, 0, 255 - f);
} else {
color_depth.at<Vec3b>(i,j) = Vec3b(0, 5, 20);
}
}
}
}

int main(int argc, char *argv[]) {
// Create a context object. This object owns the handles to all connected realsense devices
rs::context ctx;

// Access the first available RealSense device
rs::device * dev = ctx.get_device(0);

// Configure Infrared stream to run at VGA resolution at 30 frames per second
dev->enable_stream(rs::stream::depth, 640, 480, rs::format::z16, 30);

// Start streaming
dev->start();

// Camera warmup - Dropped several first frames to let auto-exposure stabilize
for(int i = 0; i < 30; i++)
dev->wait_for_frames();

// Creating OpenCV Matrix from a color image
Mat depth(Size(640, 480), CV_16U, (void*)dev->get_frame_data(rs::stream::depth), Mat::AUTO_STEP);

// Create a color depth
Mat color_depth;
make_depth_histogram(depth, color_depth);

// Create a normalized depth
double min, max;
minMaxLoc(depth, &min, &max);
Mat depth_normalized;
double alpha = 255.0/(max-min);
depth.convertTo(depth_normalized, CV_8U, alpha, -min*alpha);

// Display in a GUI
imshow("Display normalized depth", depth_normalized);
imshow("Display color depth", color_depth);

waitKey(0);

return 0;
}
Другие решения
Единственное решение, которое я нашел для этой проблемы, которое дает удовлетворительные результаты, заключается в следующем:
- Сохраните изображение как файл PNG. (PNG поддерживает сохранение 16-битных изображений)
-
Используйте matplotlib, чтобы просмотреть его на цветной карте.
#!/usr/bin/python3
import numpy as np
import cv2
import sys
from matplotlib import pyplot as plt

def printCoordinates(event):
x,y = event.xdata,event.ydata
if x != None:
print("X : ",x," Y: ",y," Value = ",img[np.int(y),np.int(x)])

img = cv2.imread(sys.argv[1],cv2.CV_16UC1)
#img = img/65535

fig = plt.figure()
plt.imshow(img,cmap='nipy_spectral')
cid = fig.canvas.mpl_connect('button_press_event',printCoordinates)
plt.colorbar()
plt.show()
Кнопка button_press_event предназначена для печати точного значения пиксела на выбранном пикселе.
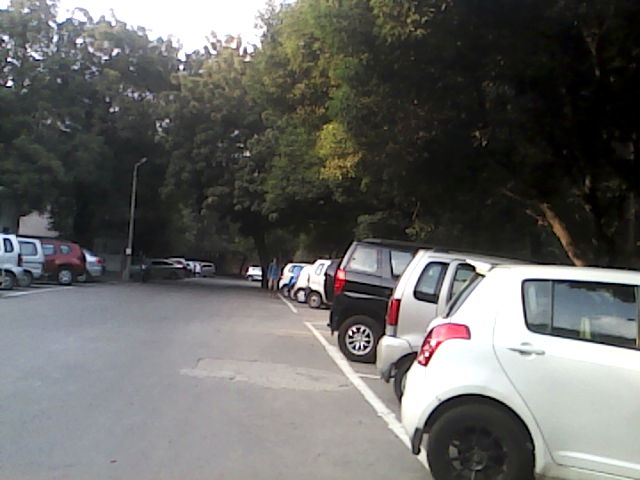
RGB Image
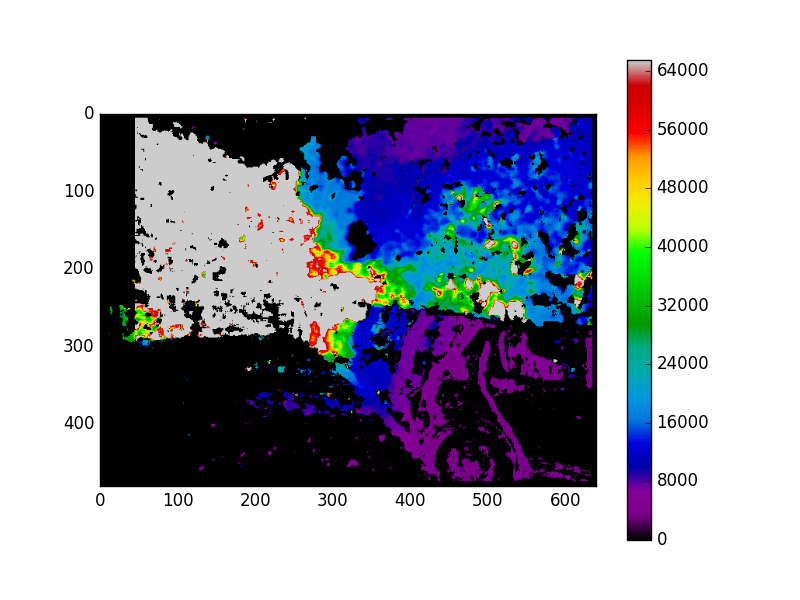
Соответствующее изображение глубины